
Héctor (@guanberdolfo) and me (@VanesaGC_Flow), talk about how to create a custom connector in Flow and how to create a flow that creates a team.
How to create a custom connector in Flow connected to microsoft graph
We prepared a collection of Graph requests in postman, previously tested. Once this is done, click on the three buttons of the Postman’s collection to be exported and on the «Export».
we prepared a collection of Graph requests in postman, previously tested. Done this, we click on the button with three points of the collection to export of the Postman and on the «Export».
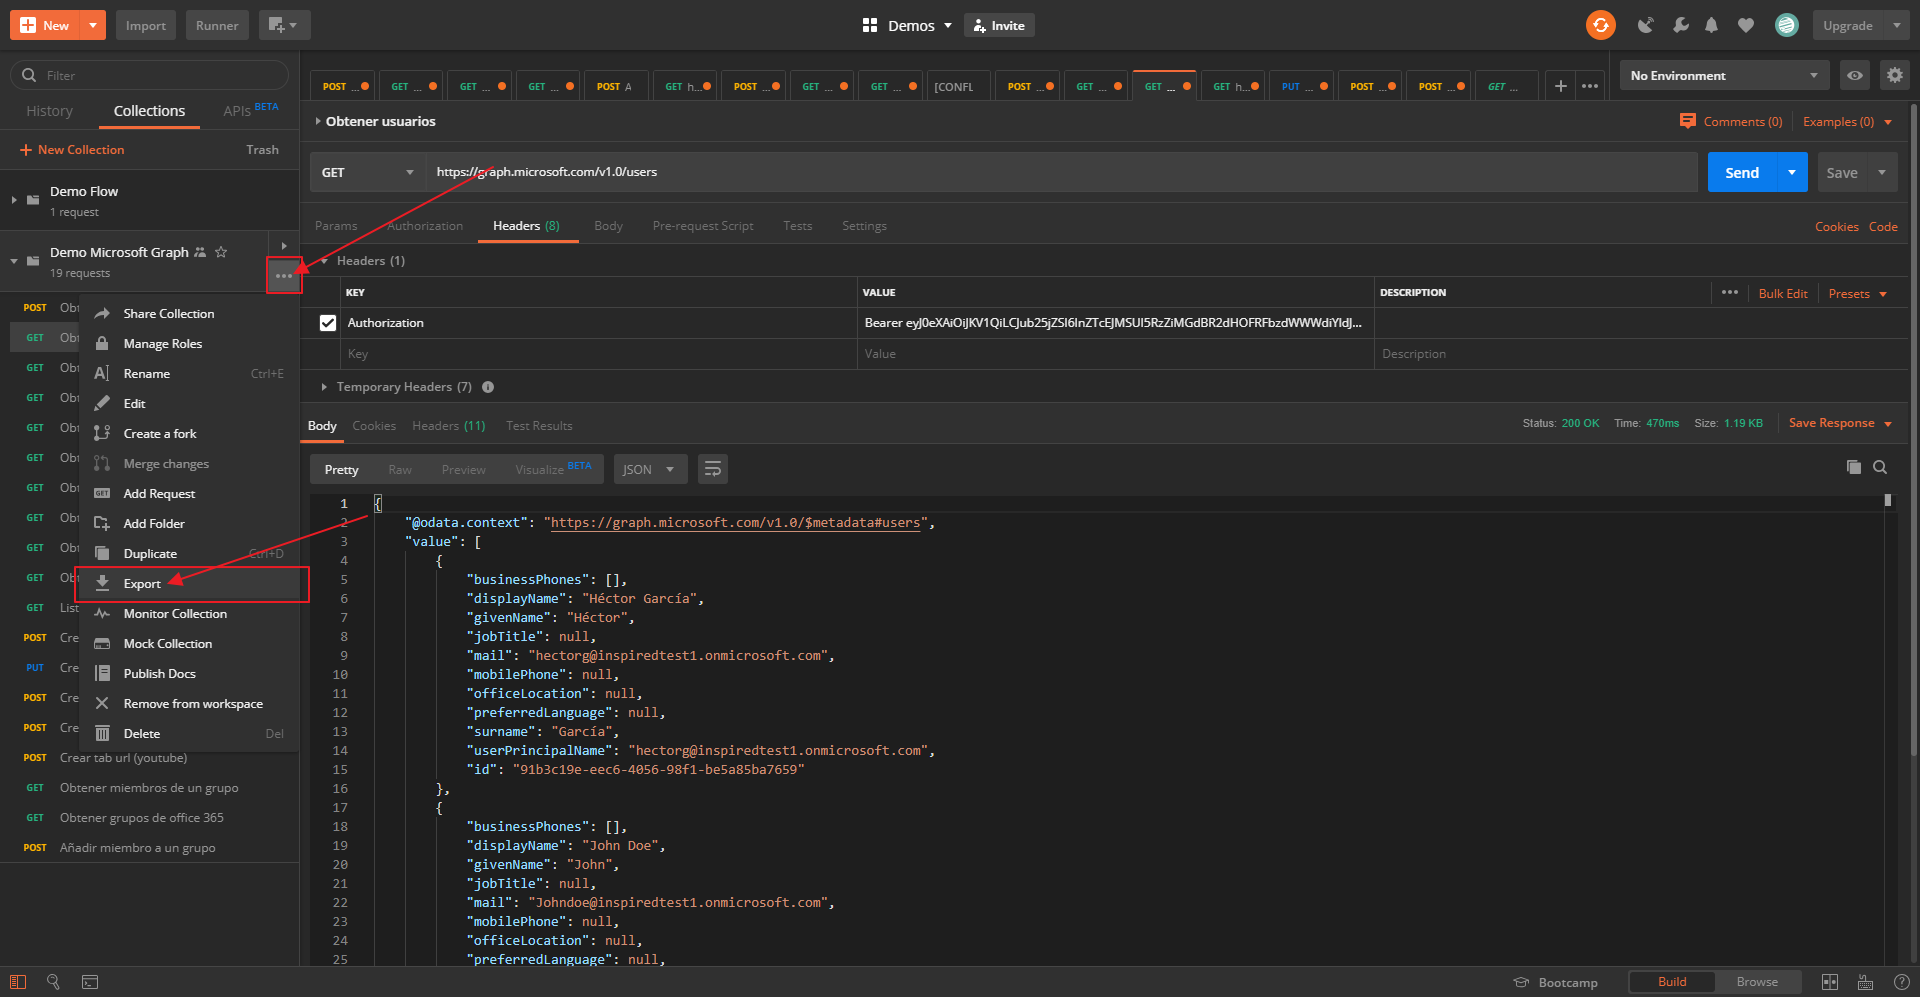
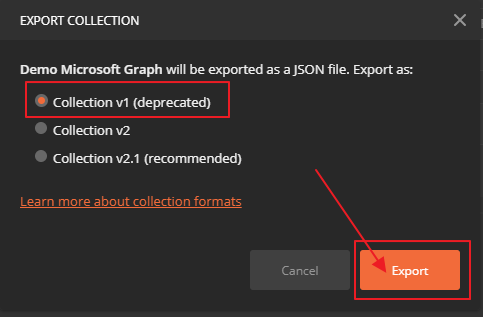
click on the element «Collection v1 (deprecated)» and on the button «Export». And it is stored in a safe place.
It is necessary to select the option «Collection v1» even if it is obsolete because, when importing the collection, Microsoft Flow only accepts this version.
Create custom Microsoft Flow connector
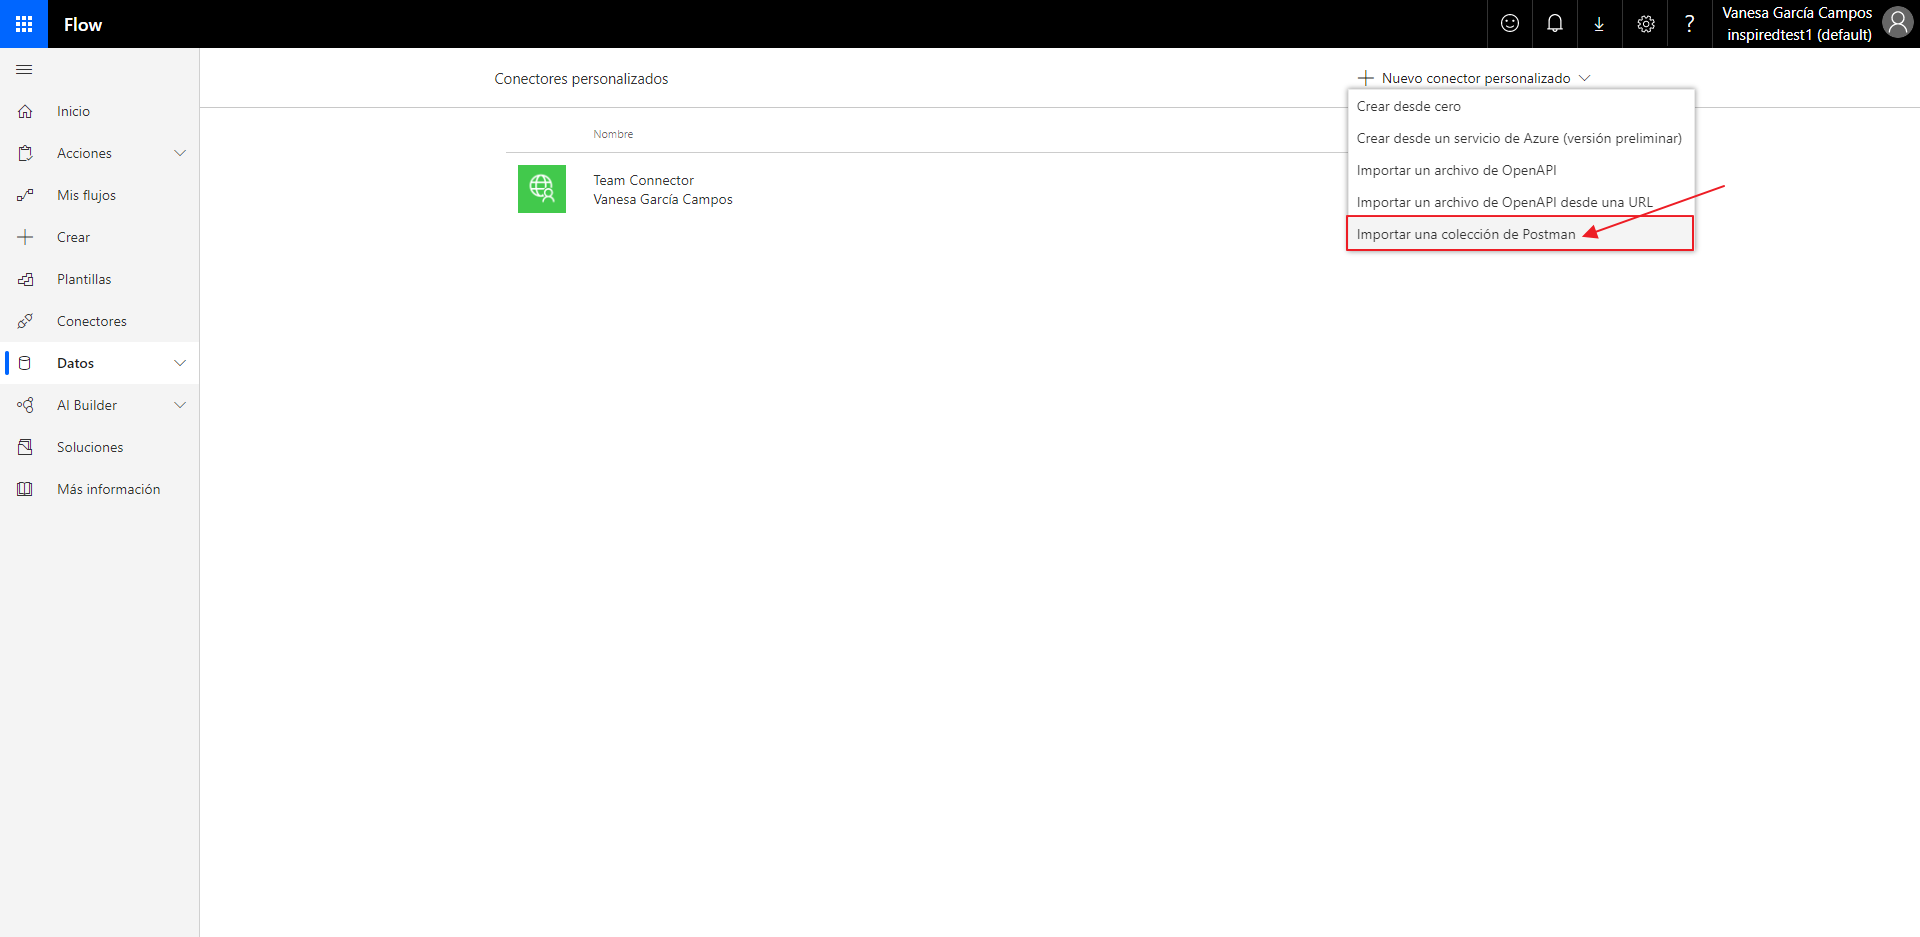
Access «Office 365», display «Data» and click on the element «Custom Connectors».

A list will appear with the existing custom connectors, to create a new one, click on the drop-down list with the name «+ New custom connector», and click on the element «Import a collection of Postman».
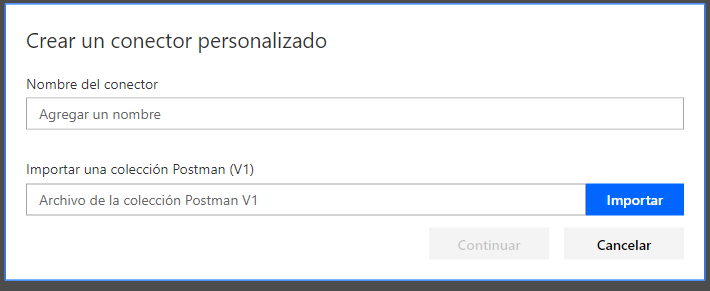
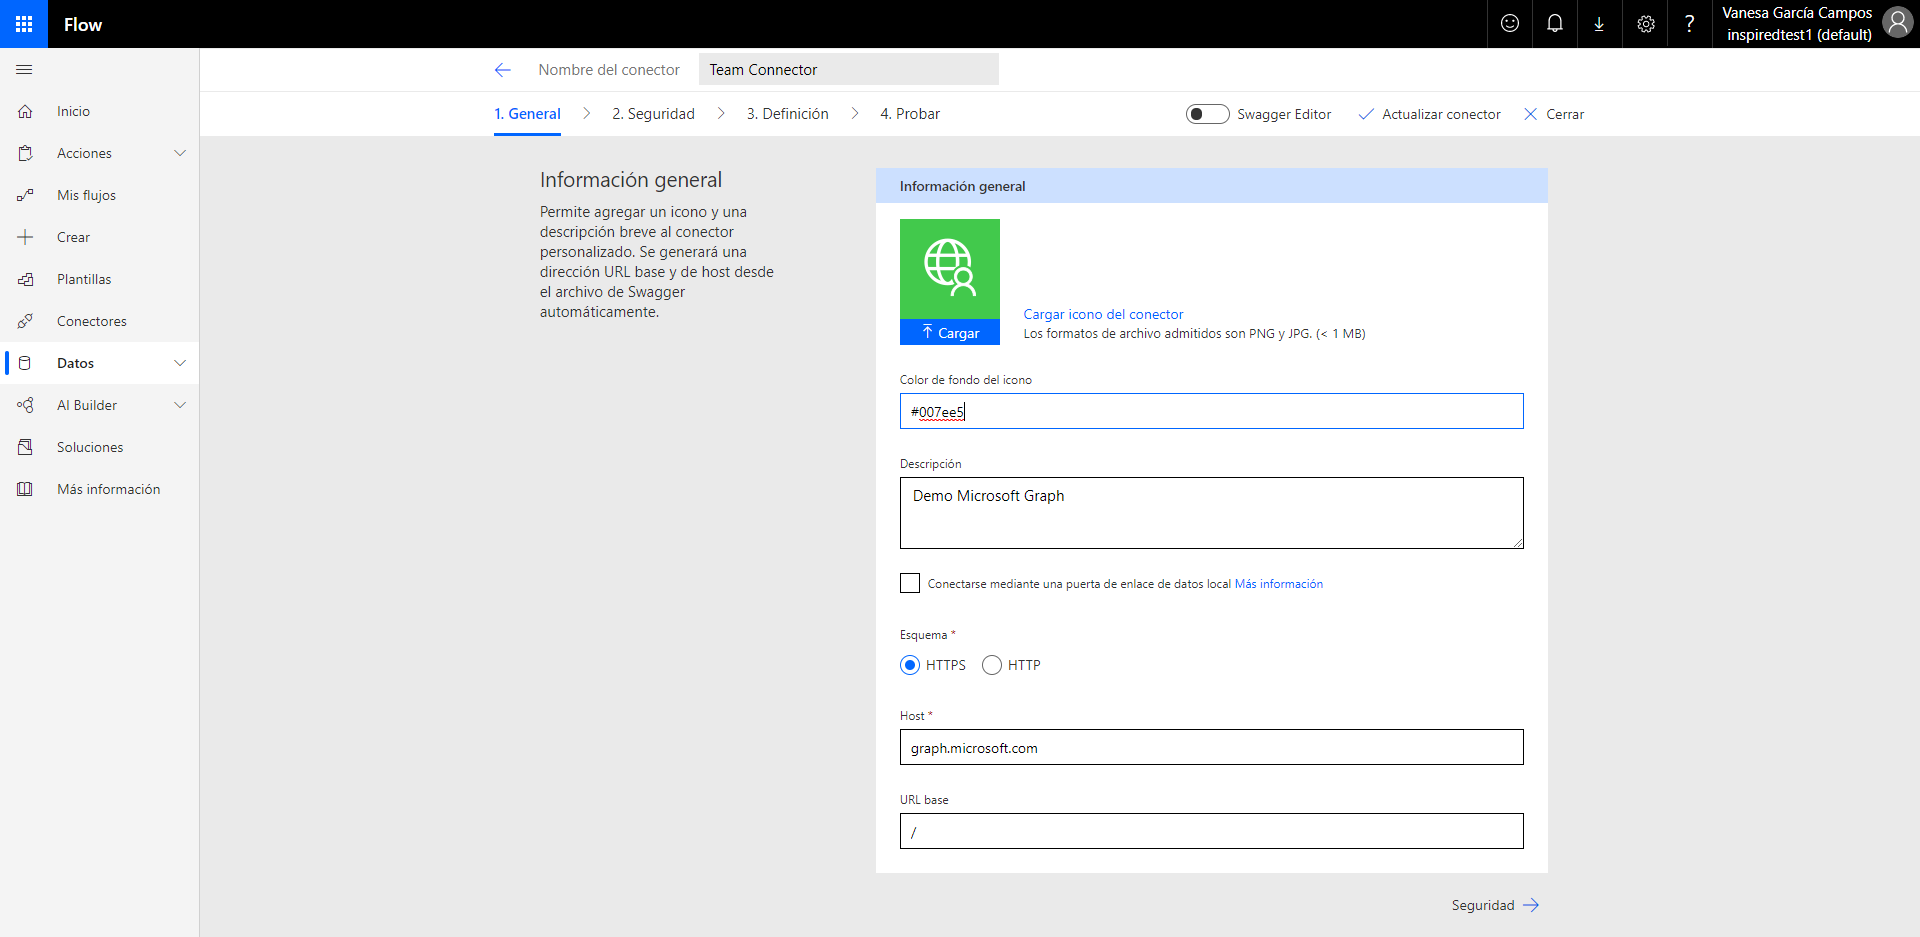
Select the file, fill in the name of the new connector and click on import.
We’ll add a description. We can see that the «host» and the «url base» are filled in by the author.
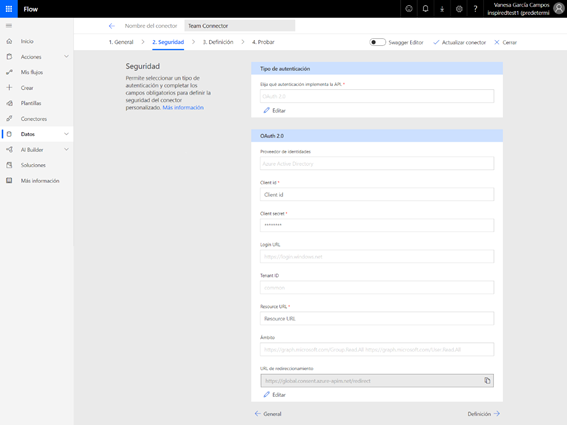
In the next tab, called «Security» we fill in the fields with the data extracted from the «application» of the «Active Directory». Previously used to get the Office 365 authentication token.
The url of the resource is https://graph.microsoft.com. The scope is https://graph.microsoft.com/Group.Read.All https://graph.microsoft.com/User.Read.All
The redirect url will be auto-generated once we have saved the configuration. This url must be copied to add it as redirect url of the active directory application.
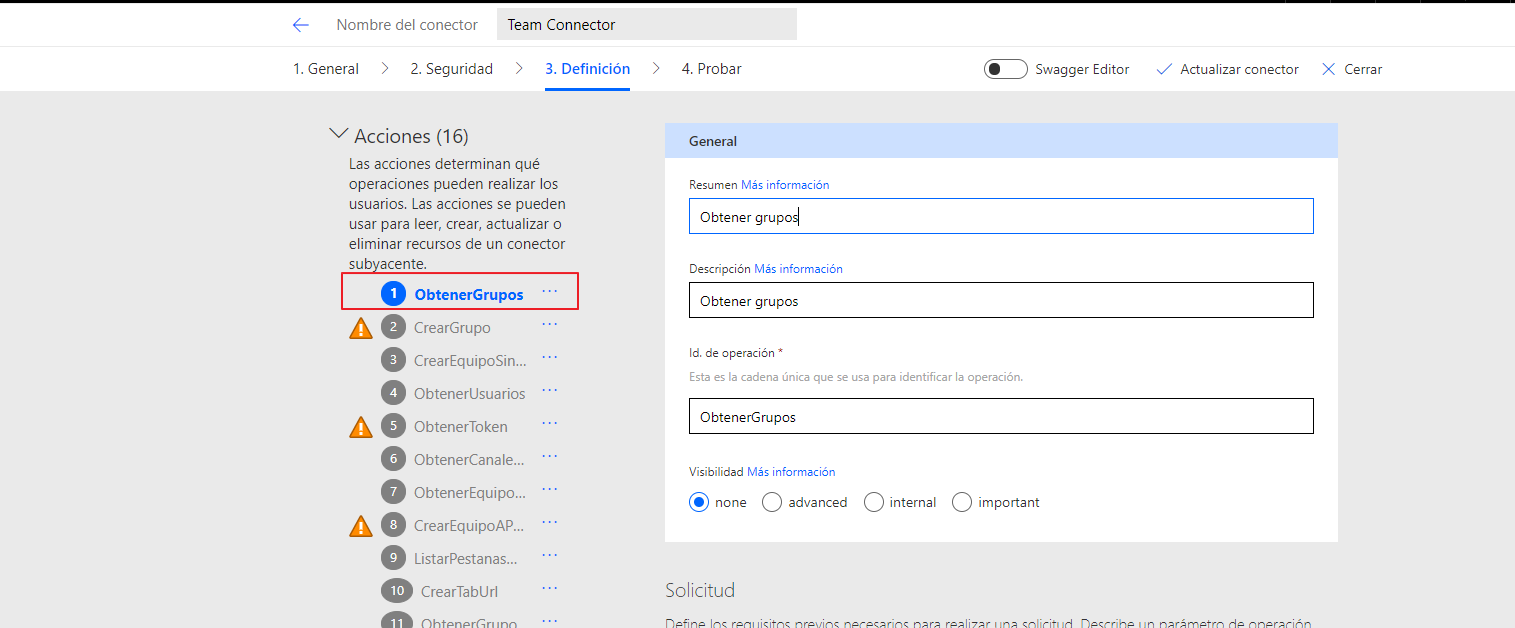
In the «Definition» tab, you can see that all the requests added to the Postman collection that we imported appear as actions in the «Actions» section of the window. We must verify that each action works correctly. Therefore, by clicking on each action and clicking on the «test» button, we can test the requests imported from the Flow itself.

Things to keep in mind when importing Postman collection
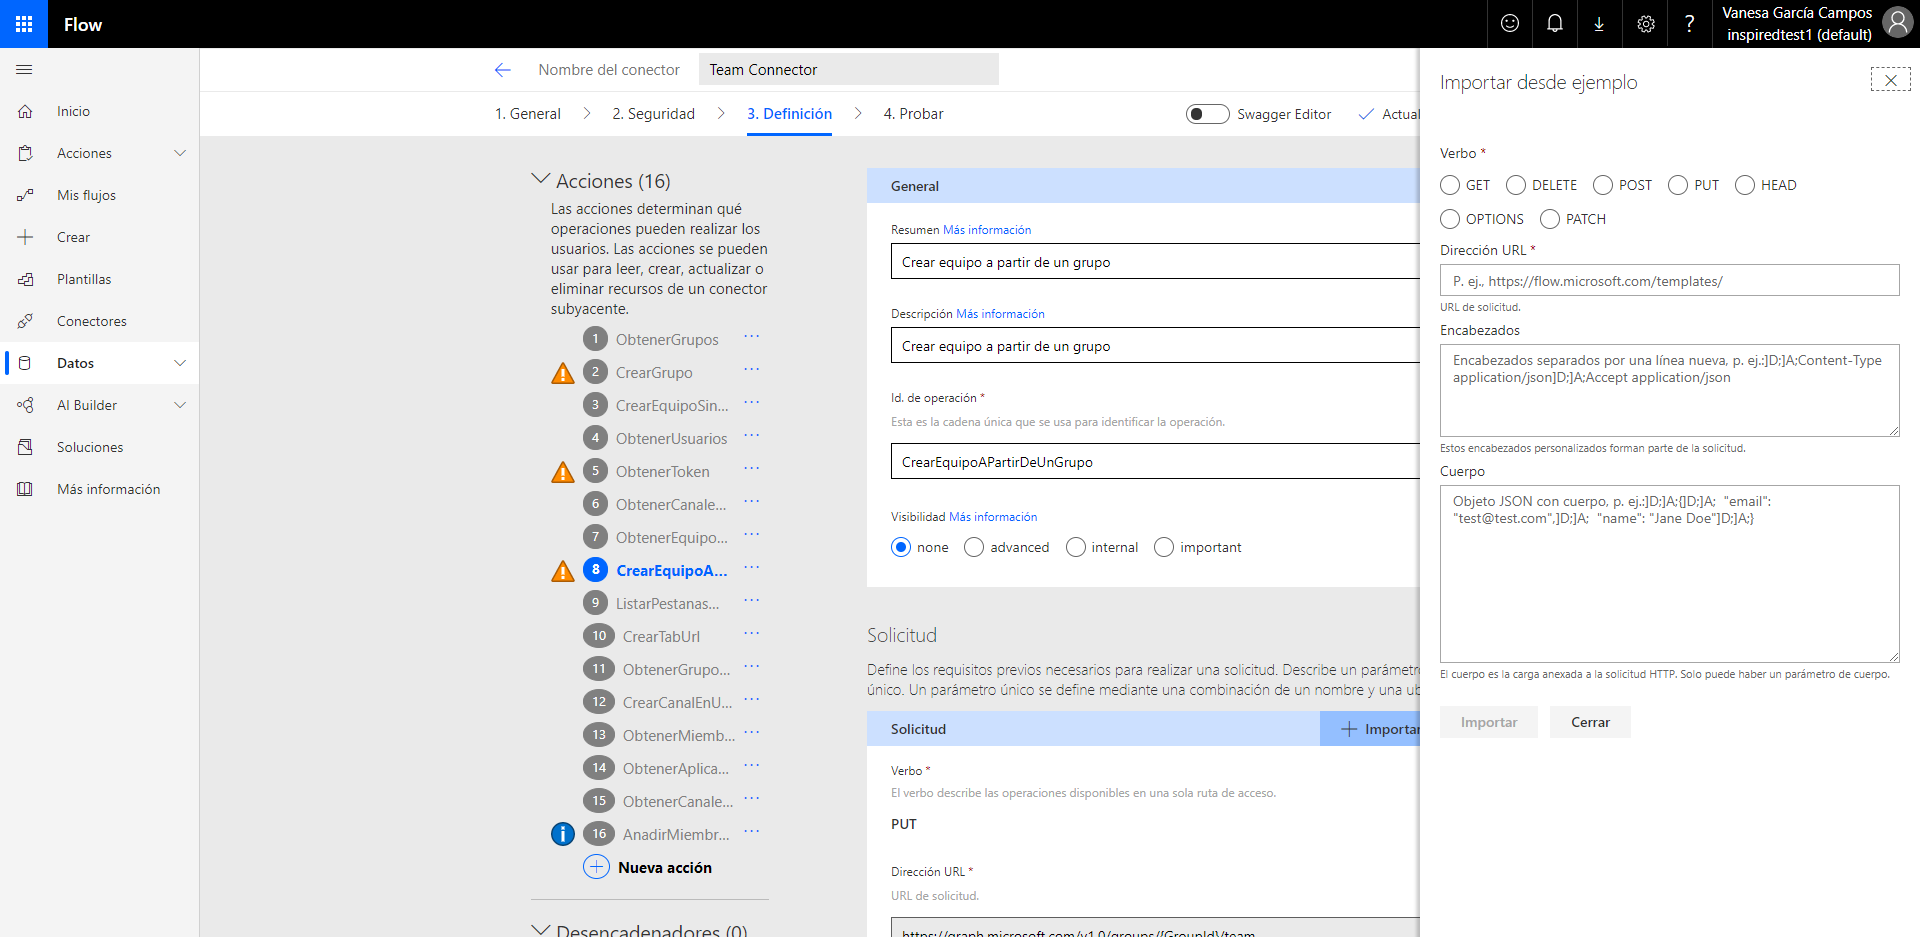
It should be noted that those requests that require a variable in the url of the request. The url must be modified, adding the name of the variable to be used between keys. This way, in the card that will be shown in the Flow when selecting the custom connector, you will have a text box with the name of the variable added to the url.
To do this, we must modify the action, double clicking on it and the button «+ import from example», we can rewrite the selected method using the new form located to the right of the screen.
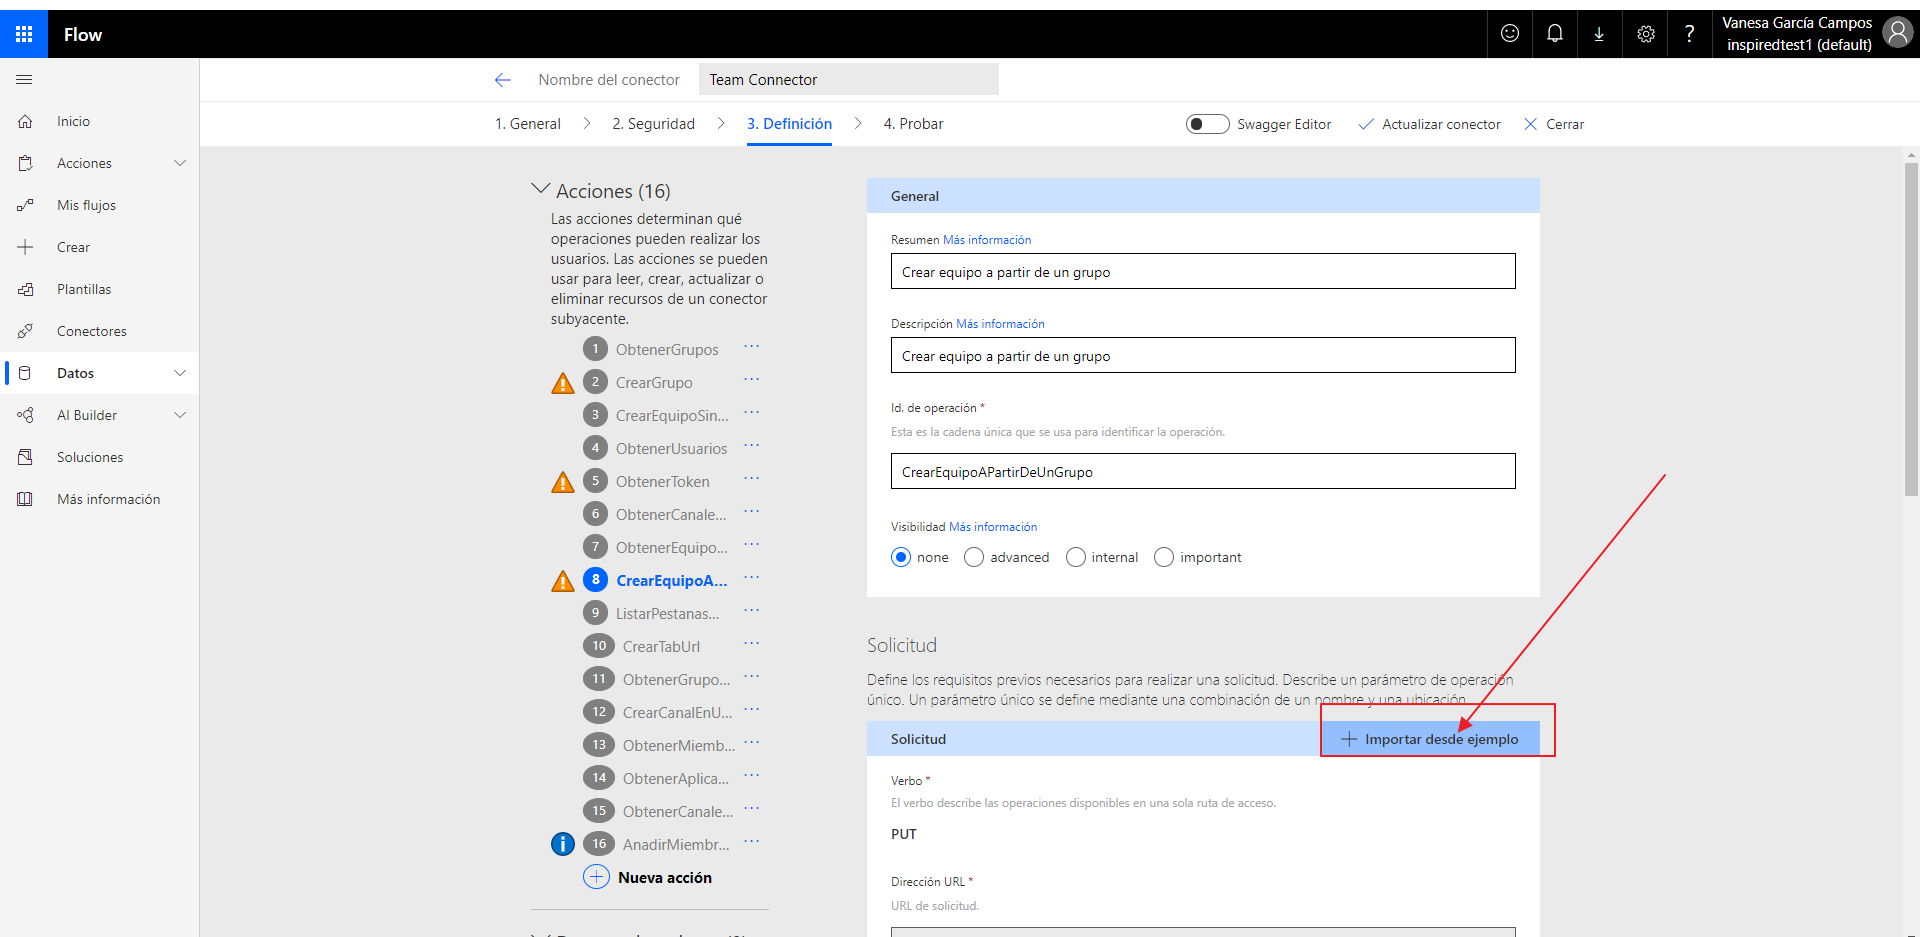
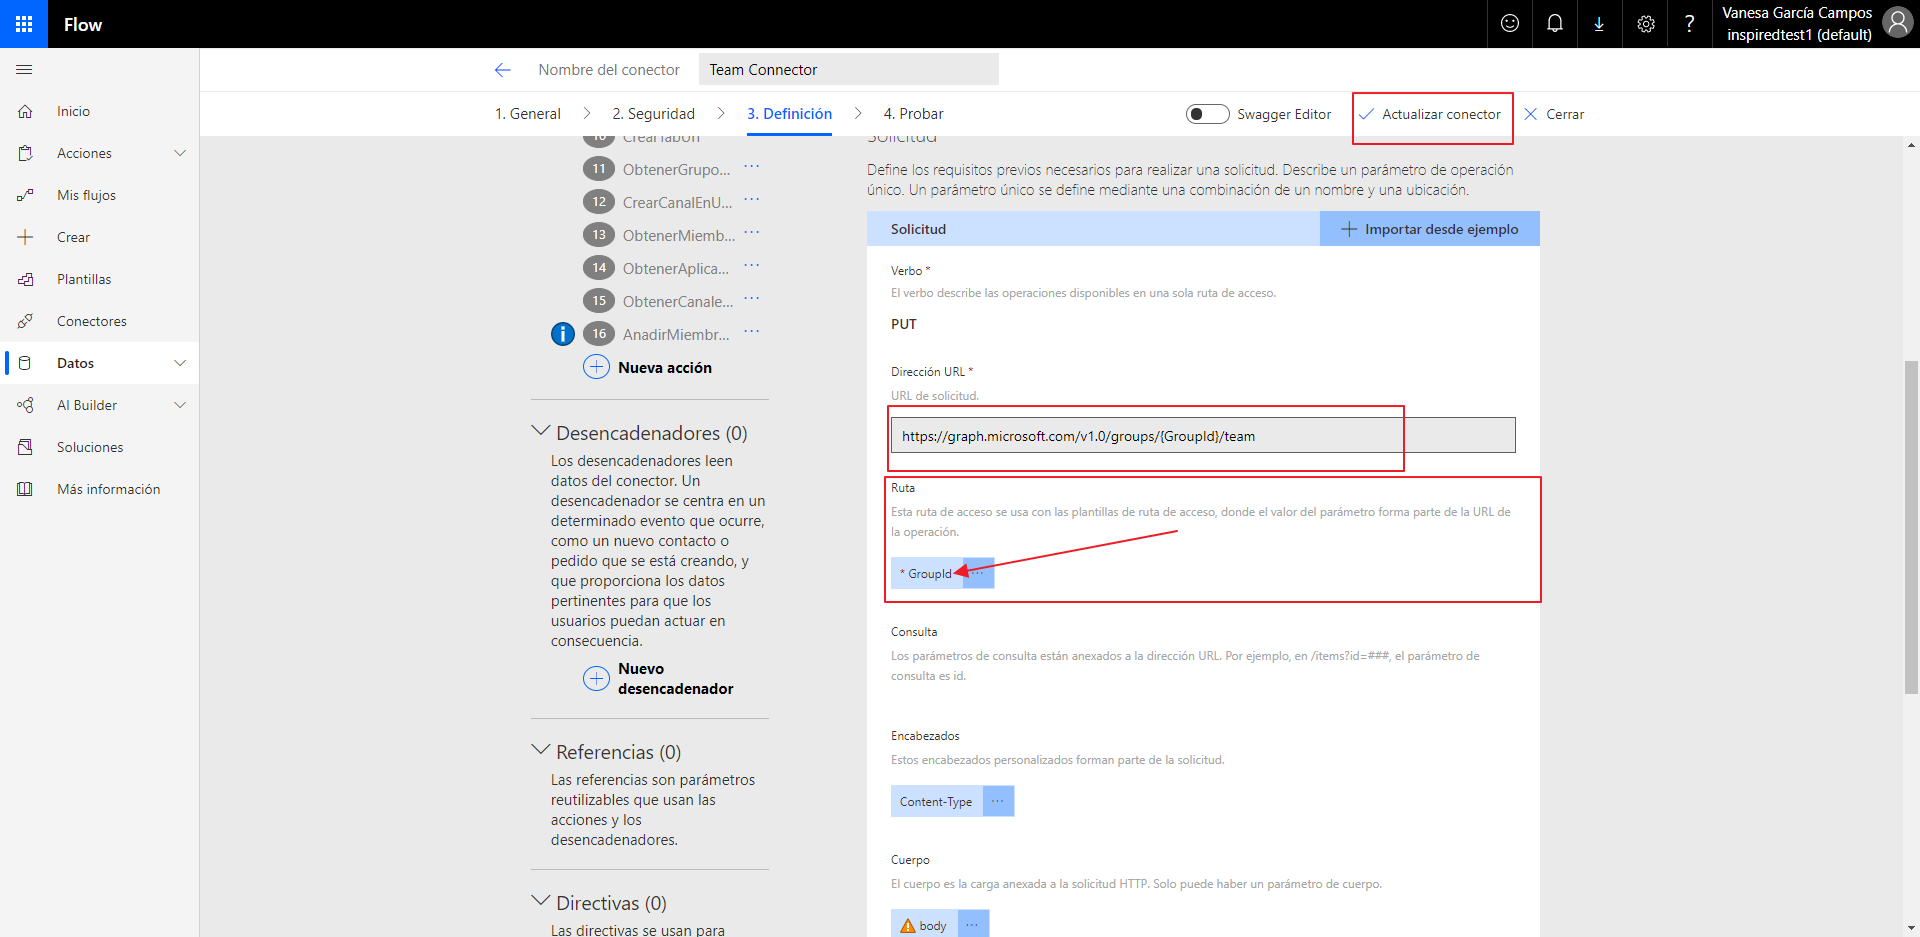
In the following screenshot, you can see how by adding the variable in the url of the request, Flow has been able to capture it and add it in the «Path» section.
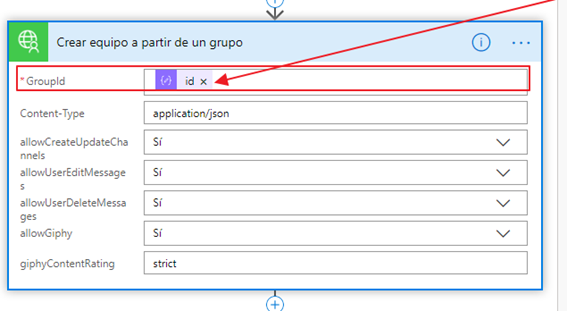
If we use the connection in the Flow, it will look like this.
Click on «Update connector» or «Save».

How to use Custom Connector in Microsoft Flow
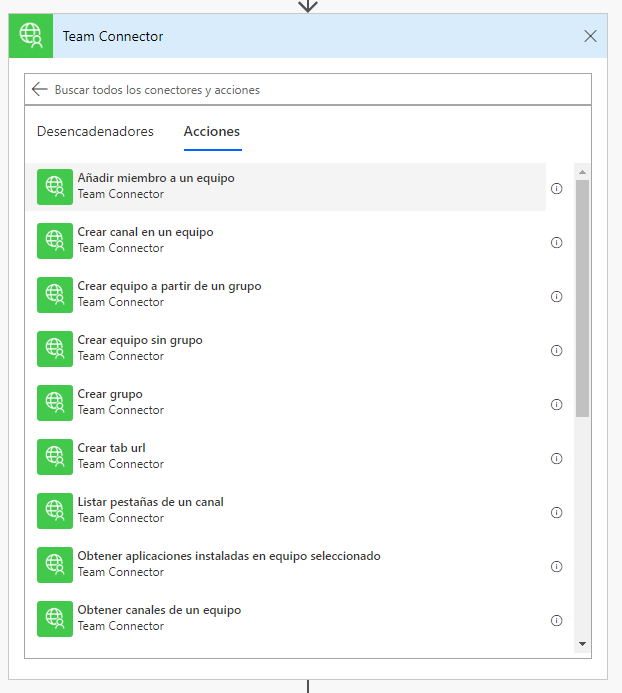
To use a custom connector in Flow, add a new action, select the «Custom» tab and click on the custom connector.
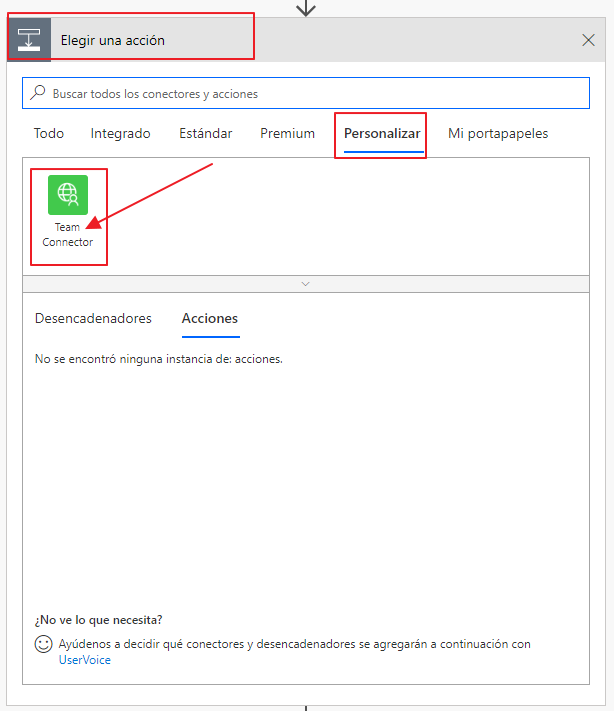
Once this is done, all the triggers and actions of the custom connector will be displayed.
How to create a Flow for the creation of a team collecting data from a post HTTP request
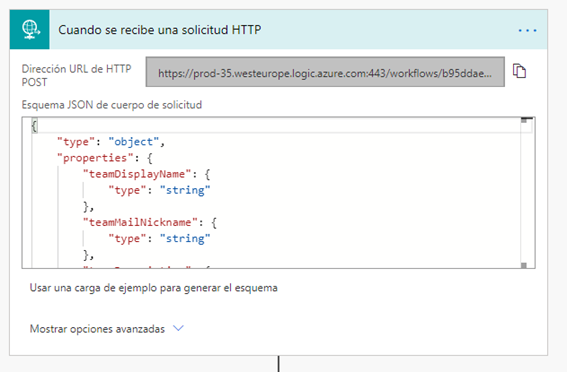
We have created a Flow, which receives a post request with the following data necessary for the creation of a Team.
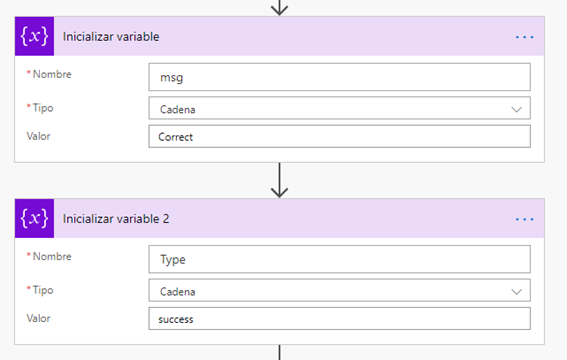
The following variables collect the final response that is sent to the request, once the flow is finished.
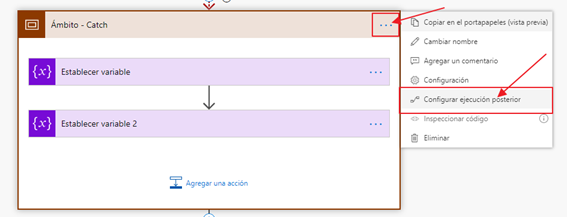
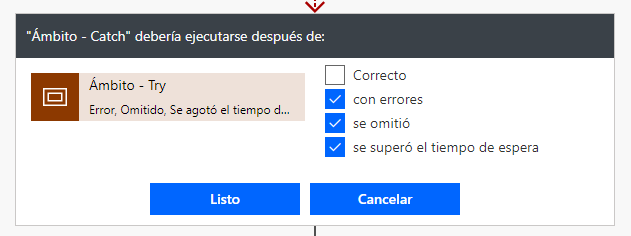
The «Try» block contains all the actions that the Flow has to execute. In case of an incident, the flow will execute the «Catch» block and then the «Finally» block. But if all goes well, the flow would only execute the block «Try» and «Finally».

This behavior is defined by clicking on the three points and clicking on «Configure subsequent execution».
On the next card, we can tick the boxes when we want that action or card to be executed. Once checked, click on the «Done» button.
Inside the «Try» block, we have added the necessary actions to create a team. Which are the following:
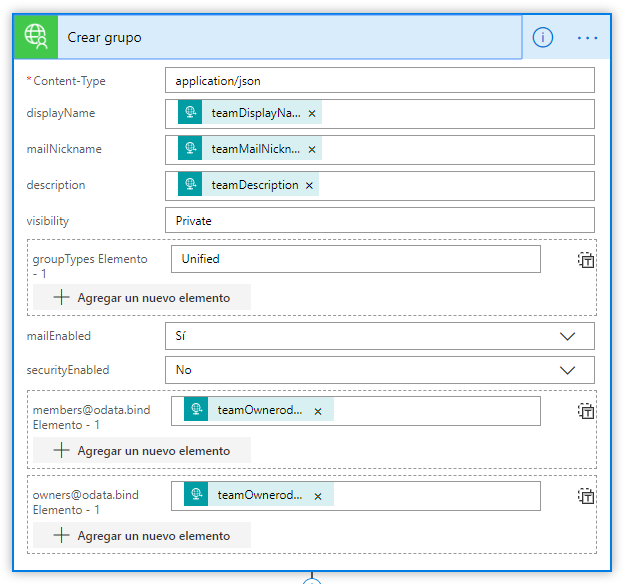
Create group: in this action we add the data obtained from the post.
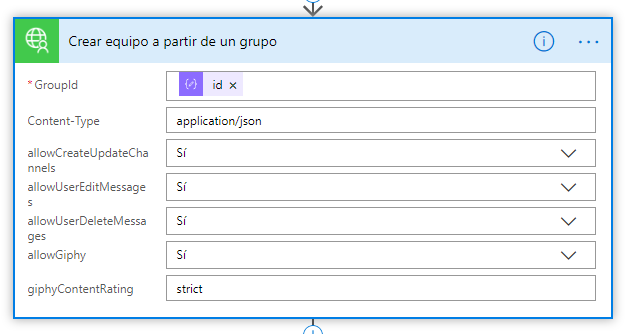
Create team from a group: add the id of the newly created group. To do this, it is necessary to parse the JSON that returns the action «Create group».
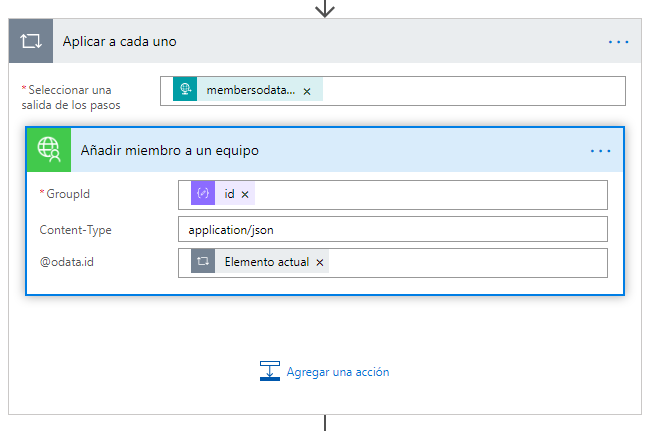
Add member to a team: each member received in the post is added to the newly created team.
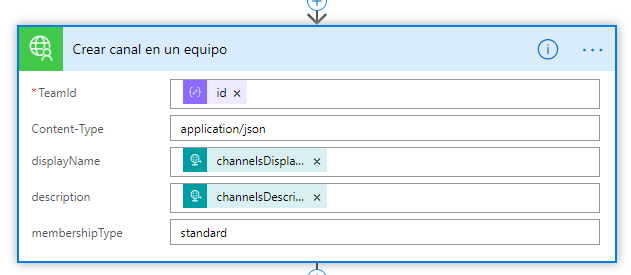
Create channel in a team: getting the id of the newly created team, we create a new channel with the name and description received in the post.
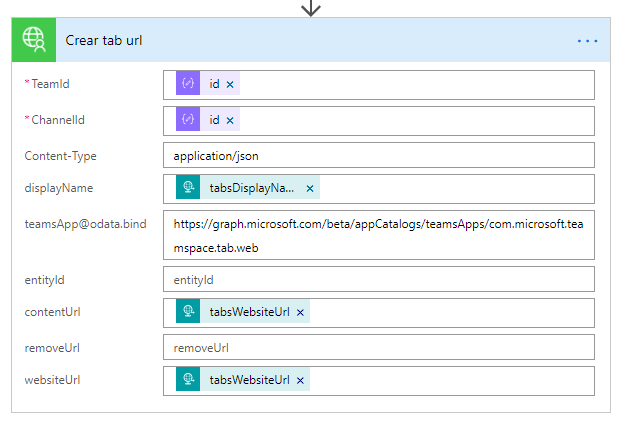
Create tab url: getting the id of the team and the newly created channel, the following action creates a tab within the channel of the newly created team, adding the web of the url obtained from the post (Trigger), as an application of the tab.
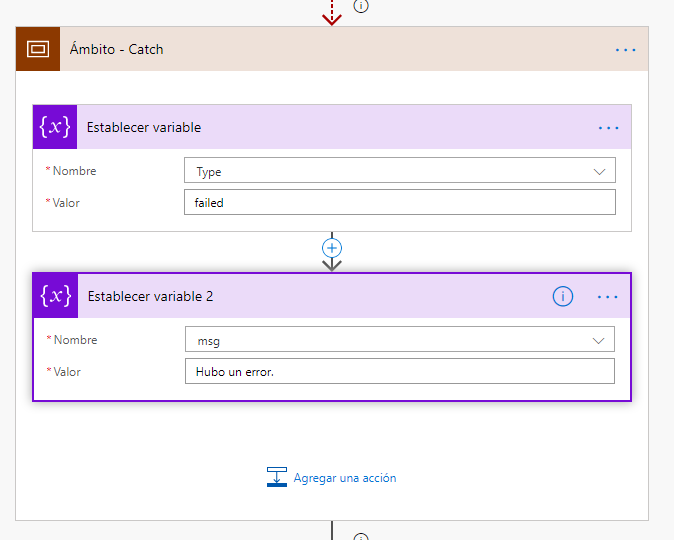
The next block will only be executed if an error occurs while executing the «Try» block. This block adds values to the variables used to inform the administrator if the Flow has gone well or not.
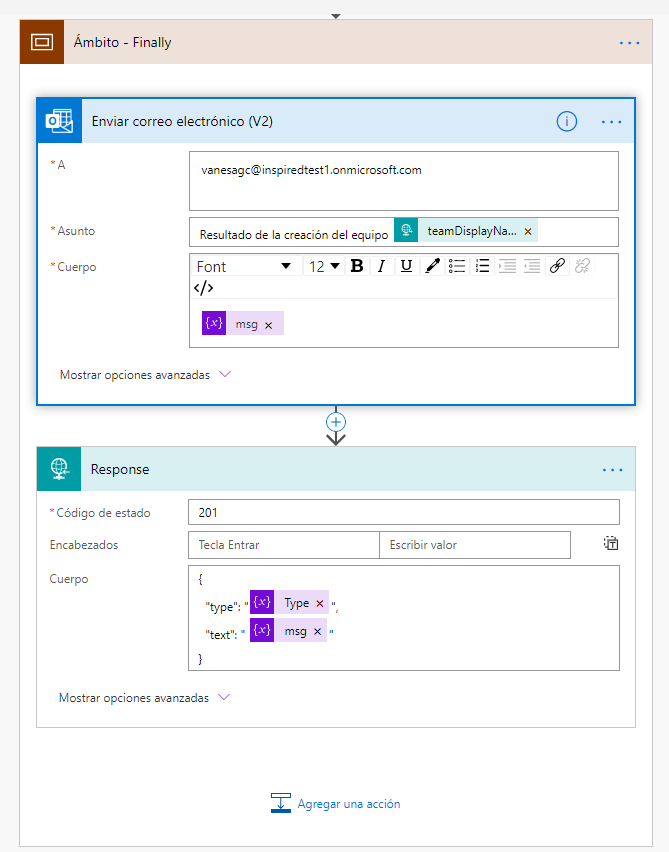
It runs whether the Flow has gone well or not. It is in charge of notifying the administrator by e-mail of the final result of the execution.
In addition, it sends an HTTP response notifying if the execution went well or not.
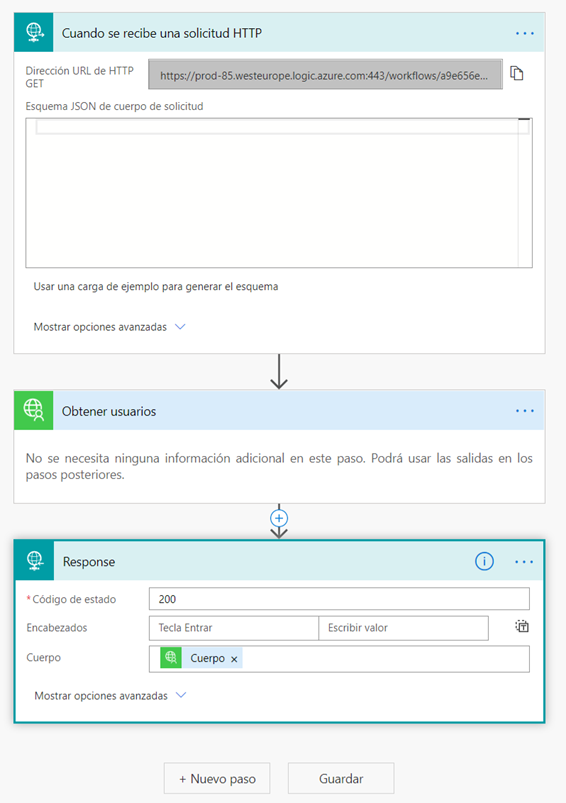
Creation of Flow «Get users»
The next Flow receives a Get request and responds by returning the Office 365 user list. This Flow will be executed by the Bot, on the occasion of the election of members of the team to create.

Creation of Flow «Get groups where the user belongs»
The following Flow returns a list of Office 365 user groups, of the user that contains the user id added in the Post request.
Flow Connector Generated
El siguiente enlace contiene el conector personalizado de Flow: https://github.com/VanesaGC/Post-Pon-a-raya-el-monstruo-que-Teams-lleva-dentro/blob/master/Team-Connector.swagger.json
See the development of the bot, clicking on https://intelequia.com/blog/post/1923/pon-a-raya-el-monstruo-que-teams-lleva-dentro-chatbot-parte-4