
The combination of both technologies allows developments with a variety of complex operations.
We have created the following tutorial, which by collecting the name and language of the user through a Power App, shows the confirmation message of an order generated by Power Automate. In this way, we can see how Power Automate is able to send response parameters to Power App too.
Developing in Power Automate
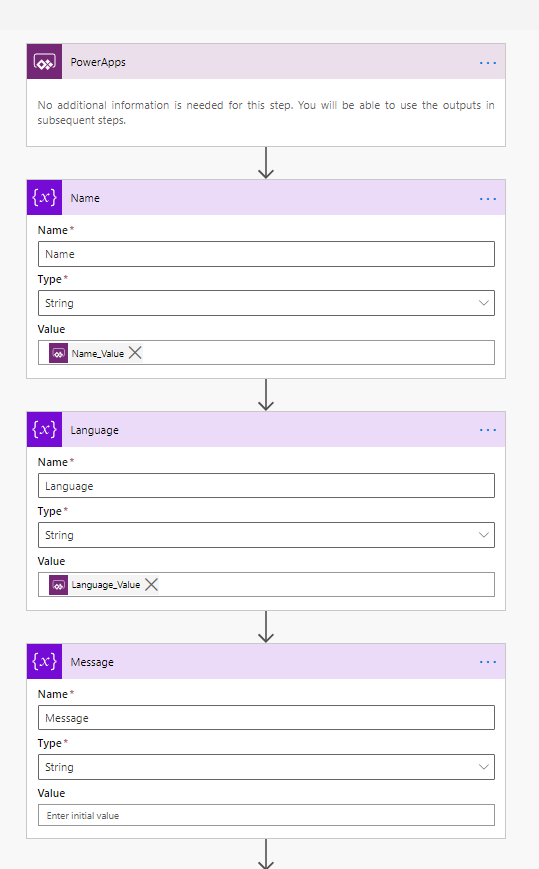
We create a flow whose trigger is a Power App call.

We add the following variables:
- Name: initializes to the name obtained from the Power App.
- Language: initializes to the language obtained from the Power App.
- Message: will contain the confirmation of the order. So, we won’t add anything as a value when we initialize this variable.
To initialize a variable with the parameter value obtained from the Power App, put the cursor in the «Value» field of the variable to be initialized and press Ctrl + space. Once this is done, the following panel will appear.
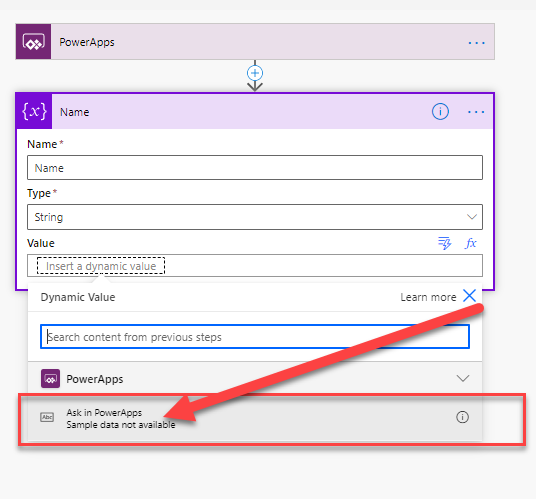
Next, you can see how the Power App label gets as part of its name, the one of the action where you clicked on «Ask in PowerApps».
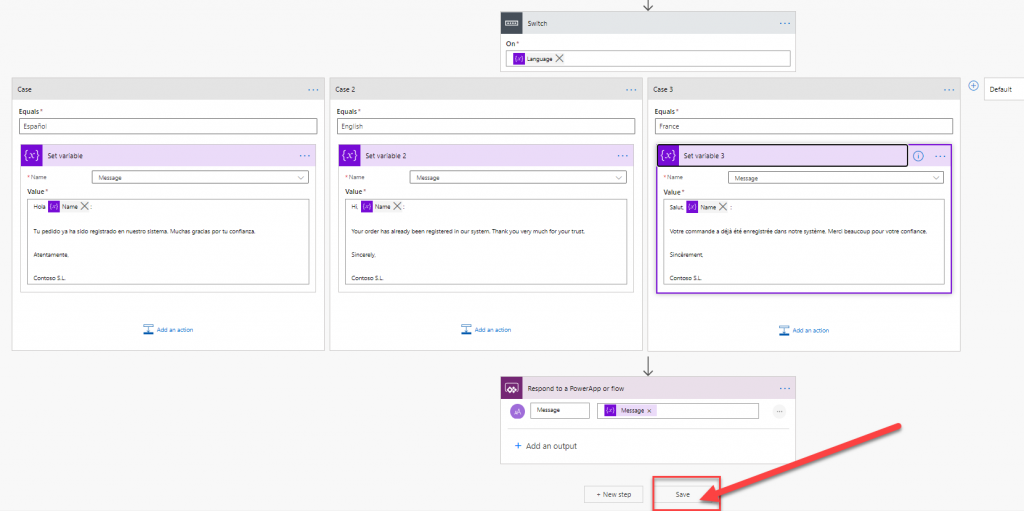
Depending on the language received, we add the order confirmation in one language or another, including the name received. Finally, we add the action «Respond to a PowerApp or Flow», including the variables to be sent to the Power App. In this case, «Message» which contains the message of the order confirmation.
Once saved, we have our Power Automate ready to be called from the Power App.
Developing in Power App
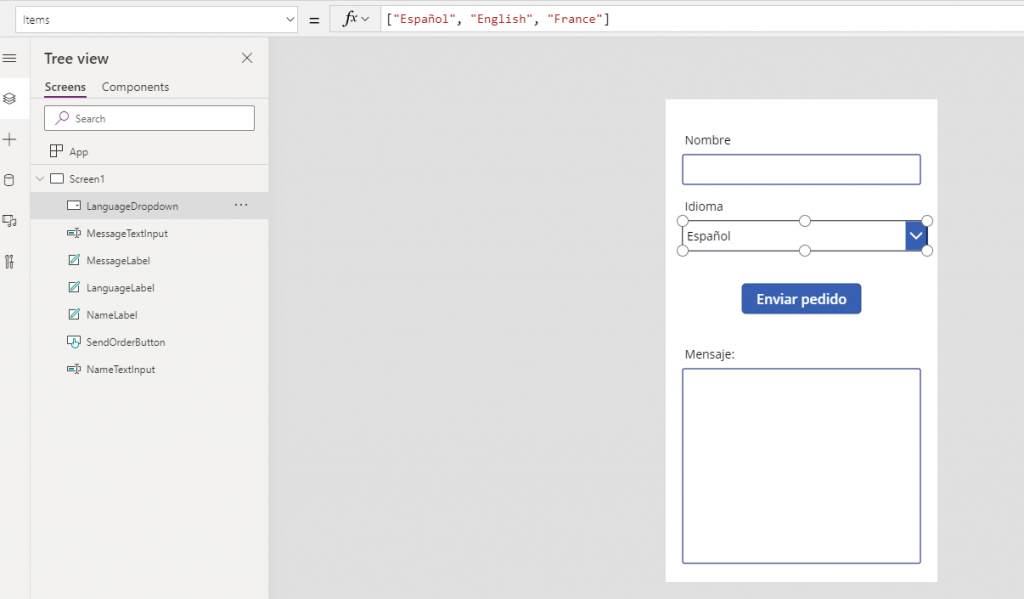
We created a PowerApp with a Screen, which contains the fields name, language (drop-down list containing all available languages) and message. And a button with the name «Send Order».
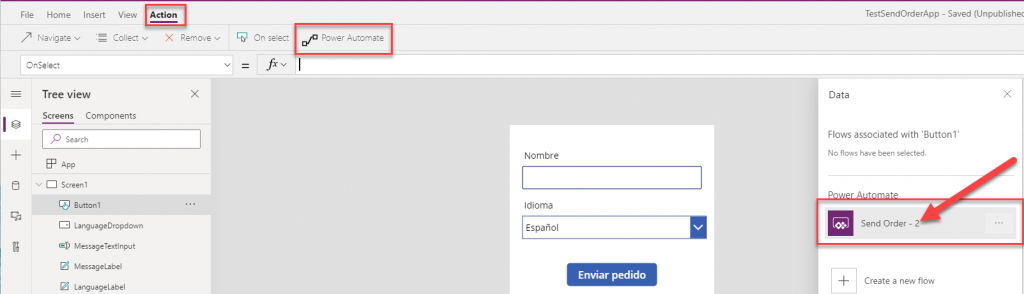
Click on the button, and in the «OnSelect» property add the newly created Power Automate
To do this, add the cursor to the «OnSelect» property of the button and click on «Action» and «Power Automate». Then, a panel with all the available flows will appear.
When you click on the corresponding cursor, a code like the following will be added: ‘flow_name.Run(«. Once this is done, we only have to add the corresponding parameters.
To get the values of the returned Power Automate parameters, we add «.» at the end of the ‘Run’ function and a list will be shown with all the available parameters to be returned.
In the example, we’re passing in the values from the Name text box and the Language dropdown. And we are storing in the «varMessage» variable the value of the «message» variable returned by the PowerAutomate.

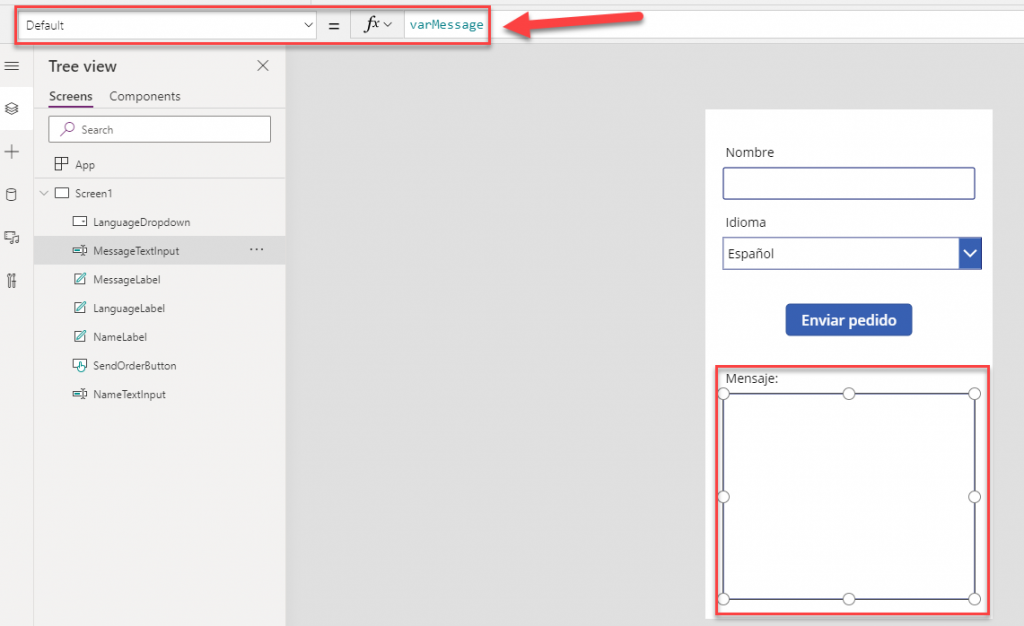
To show the order confirmation, returned by Power Automate. We have created a multi-line text box, which contains the value of the variable «varMessage».
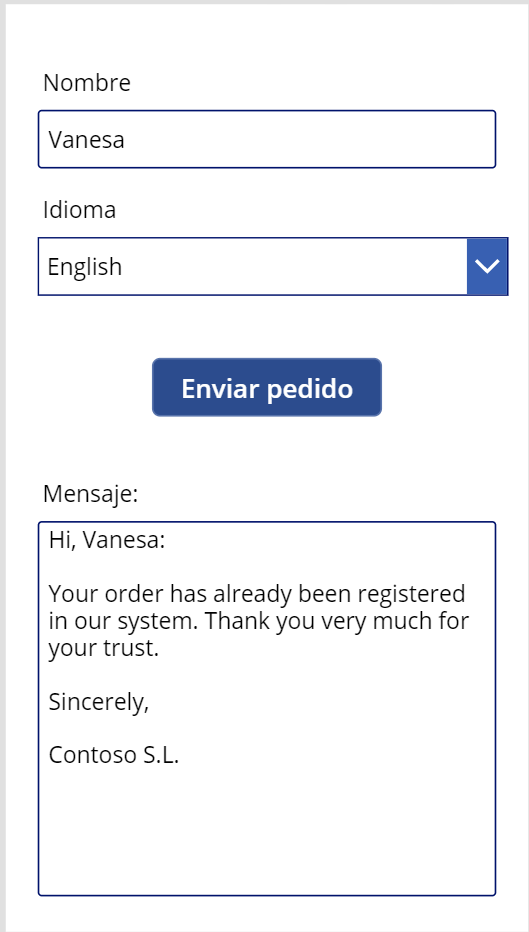
The result when you press the «Send Order» button, with the Name and Language field filled in, is as follows.
I hope it was useful to you.
Happy coding!!